
Dialing in Beginnings
One thing you will quickly find as you start to dial in your MacOS configuration is a need to be able to work effectively at the command line. When I moved to OS X from Windows running Solaris x86 and flavors of Linux in VMs or dual boot setups I was so grateful! But iTerm takes us to another level!
iTerm gives you the ability to configure your term so well it feels like an incredible text editor and IDE! With XQuartz you can use ssh -Y to even use it to drive you X Server to install Oracle on a remote server via the GUI (let me know in the comments if this interests you and I can break down the details and demonstrate in a screencast).
iTerm has the ability to change fonts that have glyphs, a password manager, open keyboard shortcut driven Tabs, and split screens with ⌘+D. That’s just the beginning!

The best way, in my humble opinion to install iTerm is to use the Homebrew package:
brew cask install iterm2
Of course you can also install it from the website. I have found the “Test” releases to be sufficiently stable for everything I do, but if you’re managing critical production systems I would strongly suggest you stick with the “Stable” release (as is installed via Homebrew).
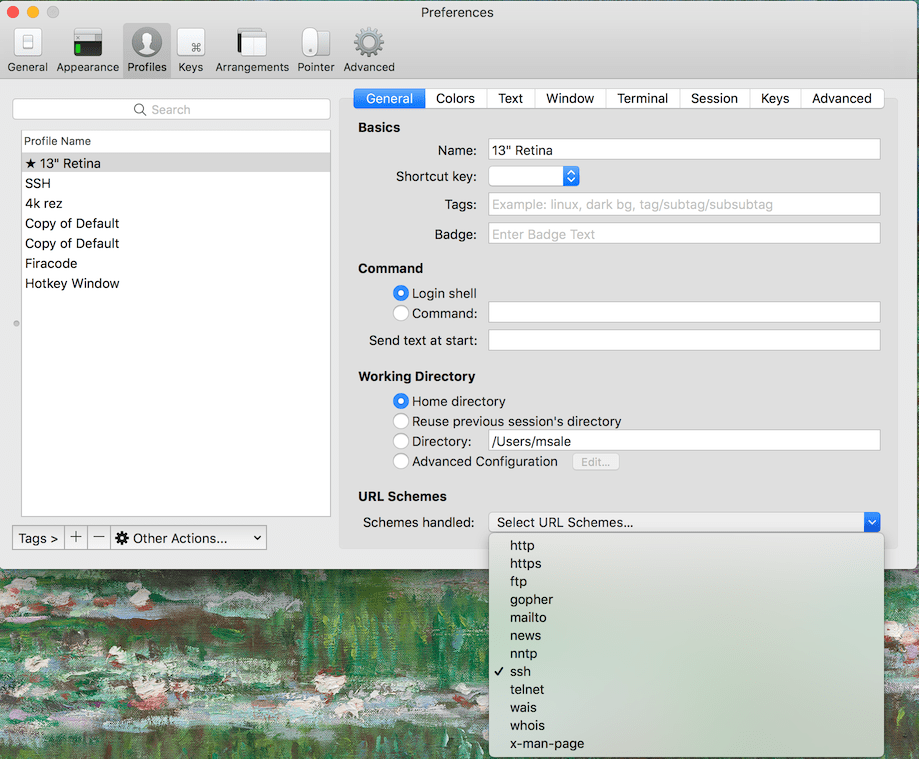
Once you have it installed, you will want to set it as your default ssh url handler by going into preferences, then select your “starred” profile (might be the only one) and select the drop down menu on the bottom right and click on “ssh” as shown here:
I also like to use iTerm with Nerd Fonts with glyphs and ligatures. Interested? Let me know!
1 thought on “Replace the MacOS Terminal with iTerm2”